Friday, September 19, 2014

Progress on Value Proposition Hexie quilt


I am up to block 11 on my quilt along with Karen At Faeries and Fibres. I have always wanted to do an English paper pieced hexie quilt and. Have been keeping up! Karen posts a block every 2 weeks and there are just 7 more to go. Here is what I have through block 10:

And here is block 11:
Karen challenged us to try making our own fabric with drawing so I did some Zentangle hearts on plain fabric for round one. Here is a detailed photo:

Block 12 was posted today at www.faeriesandfibres.blogspot.com. 

Happy stitching!
Deb

Sunday, July 6, 2014

Another Soft and Stable bag.....

Remember the back pack I made for my daughter? She loves it, yay! But she just announced yesterday that she REALLY needs a matching carry on bag for her upcoming trip to England that she is going on with my dad (lucky her!). Fortunately I had already purchased this pattern but had not planned on making it quite yet!

It's another By Annie pattern, and once again has terrific instructions, but LOTS of pieces! So I spent a couple hours last night just cutting everything out and labelling with the handy sheet of reference labels in the pattern. I do need to run to Joann's to get some zippers though. I have until Friday to get it done before  our trip to the Adirondacks. Yikes! 

Another thing I was hoping to get done by then is a skirt. I was blog hopping yesterday-don't you love the bunny trails you end up on sometimes following one link after another? I started with Faeries and Fibres where I am doing this hexie quilt along:

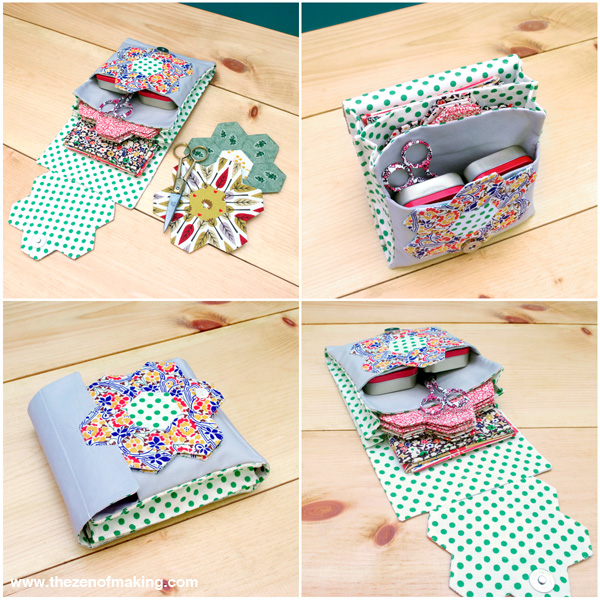
Karen had a link to a cute little project bag that I thought about making:
Tutorial: English Paper Piecing Travel Kit, Hexies Part 3 | The Zen of Making

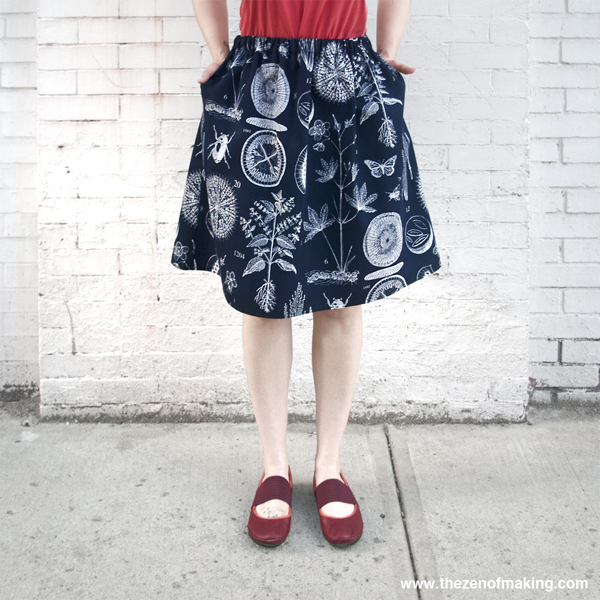
This tutorial is at the The Zen of Making. Well then I found this cute skirt tutorial there too:

Tutorial: Perfect Summer Skirt (with Pockets!) | The Zen of Making

I have such a hard time finding skirts that don't make me look like the side of a house and are not too short. For two yards of fabric I might just try it. I'll let you know if it ends up in the scrap pile or not!

OK, off to Joann's for supplies!

Happy sewing!
Deb

Sunday, June 1, 2014

My weekend project and a pattern review

At open sew at my LQS on Thursday night and all day Friday I worked on this backpack purse for my daughter.

This is the pattern from By Annies Soft and Stable.

Lots of pieces and steps in this one but the pattern was SO well written that it was no problem at all. One of the greatest things that I loved is that they give you a sheet that you can copy and cut apart with labels to attach to each piece as you cut them. If not for that I think I would have lost my mind keeping track of all of the pieces. It was awesome! 
Here is the back of the bag:

I also got the hardware that was needed for the straps right from the site. They have great finishing kits for each pattern. 

The way it is sewn together is so neat that there are no exposed seams then you are done. The hardest part was that you have to bind the inside seams. A little tedious but SUCH a nice finish.


The first step in the bag is to quilt the outer fabric to the lining with Soft and Stable in between as batting. If you have never worked with Soft and Stable, it gives a great finish to a bag. Just like a Vera Bradley! Sewing together several layers when putting the bag together is a little bit of a challenge but with a walking foot it works out fine. One of the options they suggest in the pattern is to take a yard of the outer and lining fabrics and the Soft and Stable and long arm quilt it. That is what I did and it was very fast that way. You ca see the swirly design I did on the photo above. 
This bag has tons of pockets , two of which are zippered. I love it. And more importantly, my daughter REALLY loves it! She actually squealed when she saw it!

I  would definitely try another pattern from By Annie. You can check them all out HERE.

This week is my birthday week and my lovely hubby has offered to accompany me on a shop hop on Friday and Saturday so I'll let you know what goodies I find!

Until then, keep stitching!

Deb


Saturday, May 24, 2014

Ready for some new projects!

I just finished a big fund raiser that I do every spring and now I can get back to SEWING!! YAY!

For the fundraiser I made this quilt for a raffle.


I also made 115 of these chapstick holdesr! Very easy. I got the pattern on Pinterest. The tutorial I used has been removed I just discovered:(  but there is a similar one HERE. I used home dec weight fabric.


I did manage to stick in a little personal quilting over the past couple of weeks and finished this little table topper from This and That patterns. I think I mentioned before that Sherri Falls does a little mystery project every 6 months and this was the latest. You can find her blog HERE.


Although I have been quilting for quite some time now, I have a few traditional quilt patterns that I have always wanted to try but never had. The first is a grandmothers flower garden. This isn't exactly that, but a hexie project that Karen at Faeries and Fibres is doing. Just scroll down to Value Proposition for the links to the first 3 blocks. She is posting a block every 2 weeks and there will be 18 all together.  Here are my first 3. This is my watching tv hand sewing project.

I have also always wanted to make a log cabin and this week the Missouri Quilt Company posted a YouTube video tutorial for a curved log cabin that looks pretty easy.  All you need is  a jelly roll and a honey bun. Check it out HERE


The last one I have been wanting to do is a tumbling block. Today I found a Moda Bakeshop tutorial using the Honeycomb precuts. I love this! I may have to look for a honeycomb and try this too.


The recipe for this is HERE

There is a shop hop coming up in a couple of weeks so I will be on the look out for a honey bun and a honeycomb for these projects. If I have specific things to shop for it's much safer than random shopping!!


Sunday, May 4, 2014

Airplane sewing....

We are back and recovered from our trip to New Orleans. We had a great time and saw some neat sights. Bourbon Street was a trip! Not the place to be on a Friday night with teenagers we found out, but fun to walk down during the day.
I loved all of the narrow streets and building with balconies with flowers. I took a ton of pics of places like this one in the French Quarter.

A trip to NO would not be complete without a visit to Cafe Dumonde and an order of Beignets (all they sell is coffee and beignets)
This place is open 24/7 and has been there since 1860!

Another neat thing was the cemeteries. They are above ground due to the lower than sea level position of NO. We only made it to one-the Lafayette Cemetery, where Double Jeopardy was filmed. Very cool!

And the street cars were so fun! $3 for an all day pass. There were several lines and we went on them all.

My daughters favorite thing was the palm trees! They were spectacular.

Before we left I decided I really needed a hand sewing project to take along. As much as I had been resisting, I really wanted to do Karens new quiltalong at Faeries and Fibres. It's a hexie project and I have always wanted to make a hexie quilt. So I cut up some 2 1/2 " squares and some paper templates (Karen has them on her blog also) and made this block.

She is posting a block every 2 weeks and I think there are going to be 18 all together. Check it out!
The first part of our flights home was very turbulent so I did not sew on that one, but on the others I did as I listened to an audiobook. Made the time go very quickly! I just finished listening to The Shoemakers Wife by Adriana Tigiani. Now I'm listening to Call the Midwives, a historical memoir of the life of a midwife in the 1950's. Very interesting history of London during that time.

Well I really need to get to work finishing some favors for a fundraiser I am doing in 2 weeks. I am making 
chapstick holders that I found on Pinterest. Pics of mine to come!

Have a great rest of the weekend!!
Deb


Thursday, April 24, 2014

Frixion pen update

I was reminded by a comment from Rebecca that I didn't report back on how the Alphabet quilt fared on the trip to Texas being in cold temps in the baggage compartment. I was happy to hear that NO marks reappeared. And Liz loved the quilt!

I want to experiment with washing a piece of fabric that has been marked with a Frixion pen and seeing if that makes a difference. I will report back. 

I have been following along with Sherri Falls little mystery at This and Patterns blog, http://www.thisandthatpatterns.typepad.com. Here are by blocks so far:


I am off to New Orleans tomorrow for a convention. No quilt shops there as far as I can tell! I'm sure I can find some kind of cool textiles in the French Market though. 


See you again soon!
Deb

Thursday, April 17, 2014

What's New in my Sewing room

Sorry for the delay! I don't know where the time goes.

Carrie P. of A Passion for Applique was the winner of the charm squares. She liked the goose block the best!

The quilt safely made it to Texas and Liz loved it. I forgot to ask her if any of the marks from the Frixion pen came back. I will find out and report back soon.

I have been working on plenty other projects in the meantime.  I finished a T shirt quilt for my cousin, who's son sadly was killed in an accident last year at age 27.  I am making two quilts for her. One for herself and one for her other son. Here is the first one.

I had the pleasure on meeting Sherri Falls from This and That Patterns at my local quilt shop last week. She flew in from Minnesota to teach some classes.Very sweet lady.  I took the one for her Short and Sweet bags which is not on her web site yet. They are so cute!

 Check out the little mystery that she has on her blog too. Here is the one I made:


This week is Spring break here and my kids and husband are away for a couple of days. I am going to surprise my daughter by FINALLY making her some valances for her room which we have been talking about FOREVER. Here is the first one:

And of course her wallhanging that she has above her bed does not match her new colors so I am making a new one to match the curtains. She loves anything British and I found a tutorial for a Union Jack wall hanging at Lily's Quilts. I am going to quilt it today and hopefully have it on the wall by the time she gets home. It's small, about 36x45, so shouldn't take long. Here is what I have so far:


I'm trying to figure out why my iphone takes such horrible pics while everyone elses look really good. I have a hard time getting them focused and the colors are all wrong. Well it is old for an iphone. That might be it. Anyway the colors on this are mint green in the border and coral for the stripes. 

Today I am going to start a quilt for a fundraiser I am doing in May. Pics to come!

Happy Stitching!
Deb


Wednesday, April 2, 2014

What else I have been working on.

There are some other things that I have been working on while finishing up the alphabet quilt.

First is Karen's Soupcon quilt along from Faeries and Fibres. She is celebrating the one year anniversary of her blog and is doing a giveaway! Go HERE to check that out!  This has been a fun wallhanging to work on with some different techniques I had not tried before. Hexies, a little applique, embroidery and paperpiecing.


I just realized I don't have pics of my other projects so I guess that will have to wait for another day!!

Don't forget to leave me a comment about your favorite alphabet block HERE for a chance to win some 30's charm squares!

Happy Sewing,
Deb

Monday, March 31, 2014

The Quilting is done....and a give away!

It's really done! I spent some time this weekend quilt this little baby and it looks great.

In the outer border I did a loopy meander type of thing.
And in the vertical sashing I did hearts.

In the small horizontal green parts of the sashing I did some circles.

I also stitched in the ditch around each white square and stitched closely around each applique shape. 

I am trying an experiment. Do you use Frixion pens for marking at all? They disappear when you iron the marks. I know the marks are supposed to come back if the fabric gets below freezing, but will go away again if you iron it again. I have heard stories of people shipping their quilts and the marks come back because they got cold on the airplane. I am sending this to Texas in a couple of weeks with my husband and kids when they go to visit and I am interested to see what will happen. I will be sure to forewarn my sister-in-law before she sees it!

If you have been following from the beginning you will remember that this was my sister-in-law's grandmothers project that was never completed, so this is for her. I can't wait until she sees it in person.

I decided my favorite block, although I loved so many of them, is the Umbrella block. A close second is the elephant.

What is your favorite?
Let me know in a comment and I will draw a random name from all the replies for a pack of charm squares from my left over 30's prints! I will draw a name next Sunday, April 6th. 

With hugs,
Deb

Thursday, March 13, 2014

Snow Day=SEW day!

Yesterday we had a snow day! So I did the final steps of the Child's Alphabet quilt. I hope my instructions are clear.

The first thing is to cut all the blocks down to 6 1/2" if you made the initial squares a little bigger as I did. Arrange then in columns as they will be in the final quilt.


Next we will make the sashing to go between the blocks in each vertical column.

Cut from the green fabric: 4 X 1 1/2" strips by WOF
Cut from back ground fabric: 8 X 1 1/2" strips by WOF

Sew a background strip to either side of each green strip. This should result in a 3 1/2" wide strip set. Make 4.

Subcut these strip sets into 6 1/2" units. Make 20.

Sew a 6 1/2" sashing unit to the bottom of each alphabet block EXCEPT for the bottom one on each column.
Arrange back onto columns:

Sew the blocks into vertical columns:
Now we will make the sashing between the columns. 
Cut 2 more strips of green (1 1/2" again) and sew together end to end, making one long strip.
Cut 4 background strips. Sew each pair together end to end, making two long strips.
Sew the background strips to either side of the green strip making a long strip set.

Measure the length of your columns. Mine were 51 3/8" long. Cut 3 pieces from your long strip set to this length and sew them between your columns.


Now we will add 3 borders as follows:
1) 1 1/2" background border
2) 1 1/2 " green border
3) 6 1/2" background border

For each border, but 6 strips by WOF and piece together as needed. I like to measure through the center of the quilt at each step and cut the border strips to this length.

We are done!

Click HERE to download a PDF of the instructions.


Friday, March 7, 2014

The layout

I have been playing with a layout for the alphabet quilt in EQ7.  This is what I have come up with to match the description that Nancy gives in the column that she wrote for block 4 (The Doll block). I also used the diagram given in the first column for guidance.

Here is my layout:

These are the fabrics I am using for the sashing and borders for Mildred's quilt:

This is not a 30's print but has all the right colors in it to blend with the blocks.

For this layout, you will need 1/2 yard of the green fabric for sashing and 2 yards of the lighter border and sashing fabric.

Cutting instructions coming soon!!

Have a great quilty weekend!

Deb


Friday, February 28, 2014

Block 24-You

Well, here we are at the final block! Nancy did something a little unexpected with this final block. She skipped over X, and used the Y to stand for YOU, whoever the recipient was. Among the paper patterns that were in Mildred's unfinished blocks there was a paper pattern for the letters X,Y and Z so that is what she did. I'm not sure where this pattern was printed but I am including both for you below. Here is Mildred's block:


Here is the original columns pattern:

While I liked the idea of the YOU, I decided to go with the XYZ for mine also. Nancy also  put the initials of the maker and the name of the recipient on her quilt. Mildred had a custom label all ready for hers that is pinned to the block as you can see above. I really wish we new when she may have made these so we could add a date. 

Here is my block:

I am planning to ad  my initials and date also.

I have figured out a layout and yardage in EQ7 and will post that next!

Block 24-You
There were still three letters in the alphabet, X,Y,Z. Had Nancy used them all she would have had an uneven number of blocks in her quilt. The quilt had been planned to have six rows of blocks with four letter blocks in each row, making 24 blocks in all.
In talking it over with the other club members, they decided to use on the “Y”.
Of course, the three letters could have been put on the same block. But Nancy had another scheme.
“Why not let the “Y” stand for “you” the person who is going to get the quilt. In my case it would stand for Joan, since it is for her that I am making the quilt.
“Then I plan to write her name at the bottom left hand of the block. That will identify it as hers in years to come. I hope, you know, that she will like it well enough to keep it and pass it on to her children’s children.
“Then in the right hand corner I am going to put my initials and the year in which I finished the quilt. So often in looking at old quilts we have wished that we knew just when they were made. In this way I’d identify the owner, the make and the year.
“Grace Roberts, who is making the quilt for her daughter, Clarice, will write, “Clarice Roberts” in the left hand corner bottom. Then in the right she will put her own initials, GDR and 30 for the year 1930. The YOU in the block itself stands for the child whose name is at the bottom left. As her mother shows it to her she will say, “This block is for you, here’s your name, Clarice Roberts.”
The group liked the idea and saw just how it worked.
A square of white gingham 6 ½ inches in size was cut and laid over the paper pattern. By holding the tow against the window pane it was possible to trace the letters “YOU” When these were traced the work was nearly done.
Fine outline or chain stitch was used to work the letters. Then the child’s or recipients name was written by each person in the lower left hand of the block and the maker’s own initials were put in the lower right hand. The date was added.
These names and dates were worked in fine running stitch.
Now the blocks were ready to be put together. All blocks were given a final pressing.
They were put in place, following the diagram given by the instruction leaflet which may be had at no cost by sending a stamped, self-addressed envelope to the paper and asking for the leaflet. Perhaps you sent for it earlier.  An interlining may be used. In that case it will be wise to tie the top and bottom at intervals, say at the four corners of each embroidered block.
Or a running scroll or simple vine may be quilted the full length of the colored strips which put the blocks together.
The quilt is a joy to behold when finished, worthy of being a real heirloom.
The club members were really sorry to see the work come to an end.

Click HERE for the YOU pattern.
Click HERE for the XYZ pattern.

Happy Stitching!

Deb


Tuesday, February 18, 2014

Block 23-Windmill

This weeks block is a cute windmill. I had a little trouble getting the arms to line up the way they were supposed to so don't look too hard. LOL.
Mildred's block
My block


Block 23 –Windmill
Perhaps it was due to the fact that the members had made so many blocks and done them so well that made Nancy ambitious in her next-to-last block of the alphabet quilt.
But she assured the members that the pattern was not as complicated as it looked at first glance.
“As you will see, the windmill arms are all of the same pattern. One simply places hem at different angles. Then the windmill frame is in one piece with the door appliquéd on top of in.  And the small flowers at the base are embroidered. I would use lazy daisy stitch for the leaved and outline or satin stitch for the flowers. The stems are in fine outline stitch of course so in the base line. Here is my color scheme: The windmill frame is gray, the door is a rich blue and the windmill arms are of a white and rose print. All of these materials are fast color. I have tried them to see. I am using these particular ones, because I happen to have these scraps on hand. I did not want to buy any more materials since the quilt is so nearly finished.”
A piece of white gingham, 6 ½ inches square, was vut and laid over the paper square which had been cut from the paper. By holding the cloth over the paper and pressing the two against the window frame it was possible to draw the pattern on the cloth by using a sharp pointed lead pencil.
The paper square was then pasted on to a piece of light-weight tag board or card board and dried under pressure.
Next the initial “w” was embroidered. Nancy chose fast color green embroidery cotton and used a fine outline stitch. She might have done it in chain stitch.
When the paper pattern was thoroughly dry the various parts of the pattern were cut. Only one windmill paper arm was cut, since all four were alike and one pattern could serve for four cloth arms.
The flowers were entirely disregarded at this time.
The paper patterns were laid on pieces of cloth and outlines were cut after allowing a quarter-inch on all sides. This gave a raw edge for turning under. The turned-under edge was basted and then the pieces were pressed.
First the building itself or frame was appliquéd with fine slanting hemming stitches. To get the correct placement the frame was laid on the penciled lines on the white block.
Then the four windmill arms were appliquéd. They were laid over the frame. The door was laid on top of the frame and appliquéd in place.
A round dot was embroidered at the spot where the four arms ----to have been joined.

Then the flowers and the base line were embroidered. And that left the block “Y” for next week.

OK-what happened to X? I guess you'll have to wait to find out!

Click HERE for the pattern.